Thursday, April 15, 2021

How To Load Ubuntu on your Locked Dell Latitude 7490

This article is about getting my friend's laptop free from Windows and loading it with Ubuntu :)

In case you have a Dell Laptop with password-protected BIOS, you may find this How To article useful. You don't need to pay to get your BIOS unlocked, it is free, just read on.

You will need to find the serial number of your laptop first. In the case of Dell Latitude the number looks like bellow:

1234567-595B

You will see this serial number, when you try to enter BIOS (pressing F2) and push the Unlock Button. With the serial number you just need to visit the site bellow:

https://bios-pw.org/

Enter there the serial number in the field under Enter your Code and press the Get Password button. This will generate a list of passwords similar to the one bellow: 

Try one of the following codes:

Dell HDD Serial Number (old)yyyyyhnn
Dell from serial number46rg65ky


Use the Dell from serial number entry and press CTRL+ENTER, when entering code in BIOS

This shall do the trick!

Bellow you can also find a video detailing the steps above:

Unlock your BIOS

After getting your BIOS free, you can follow on the instructions links bellow to prepare:

Ubuntu Installation Stick using Ubuntu

Ubuntu Installation Stick using Windows

You will need then to reboot your laptop and press F12 to Enter the System Boot Menu. In this menu you should be able to identify the USB stick as one of the proposed boot options.

Select it and press Enter.

You will soon see a similar screen to the one bellow (without the Webinar publicity browser window).

https://ubuntucommunity.s3-us-east-2.amazonaws.com/original/2X/4/43a6f9ad883ac86ecc11a8170b69b895d8b42e0e.png 

To finish with the installation, just follow the instructions from the link bellow:

Installing Ubuntu Desktop

Finally, Enjoy your brand new Linux :)

And if you wonder what Ubuntu means, check the video bellow:

Ubuntu explained by Nelson Mandela 
 

Friday, April 2, 2021

Orange Pi PC as Android Box

Необходим хардуер

Този пост описва как да превърнем телевизора си в Андроид устройство.
За целта ще използвам евтина платка Orange Pi PC.
Техническите детайли за платката са представени в този линк:
 
Платката може да се поръчи в България от следния сайт за 44 лв.:
 
За да работи ще имате нужда от подходящо захранване:
Бърза SD картa:
За упражлението на екране може да ползвате  безкабелна мишка.

Зареждане на Андроид

За да тръгне Андроид ОС на тази платка, ще имаме нужда от свободната програма:
и фърмуер (image file) за:
 
Преди да стартирате PhoenixCard SW, проверете и инсталирайте следният пакет:
Microsoft Visual C++ 2008 Redistributable Package (x86)
 

Приготвяне на картата

Сложете картата в подходящ адаптер или в микро SD слота на вашият лаптоп.
След това стартирайте PhoenixCard SW.
 
Изберете съответното устройство и форматирайте картата първо:

Phoenixcard1
 
След това изберете директорията, където свалихте Адроид фърмуер (image file).
Изберете "Startup" Write Mode и натиснете Burn.
 
Phoenixcard3

Стартиране на платката 

Преди да захраните платката, поставете картата в предвидения слот и свържете платката към телевизора с HDMI кабел.

Сега може да свържите захранването, след което платката ще започне да зарежда Андроид. Първоначалното зареждане може да отнеме време. Изчакайте поне 5 минути.

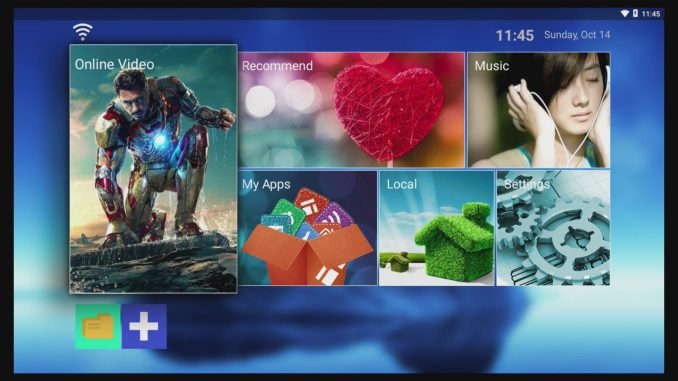
Когато ситемата се зареди ще видите следният екран:
 
orange Pi running Android 7.12 OS
 
За да управлявате екрана е най добре да свържете дистанционна мишка в един от USB портовете на платката.

И така, наслаждавайте се на Андроид на голям екран :)


How To Load Ubuntu on your Locked Dell Latitude 7490

This article is about getting my friend's laptop free from Windows and loading it with Ubuntu :) In case you have a Dell Laptop with pas...